This post may contain affiliate links. If you make a purchase through links on our site, we may earn a commission.
It was a gift from a friend that inspired me to propagate spider plants. A baby plant handed over in a little jar of water that I carefully brought home and eventually planted in a pot. Spider plants make it easy for houseplant collectors. They actually produce tiny plantlets that cascade off the plant looking like they need to be potted. This makes propagation a cinch.
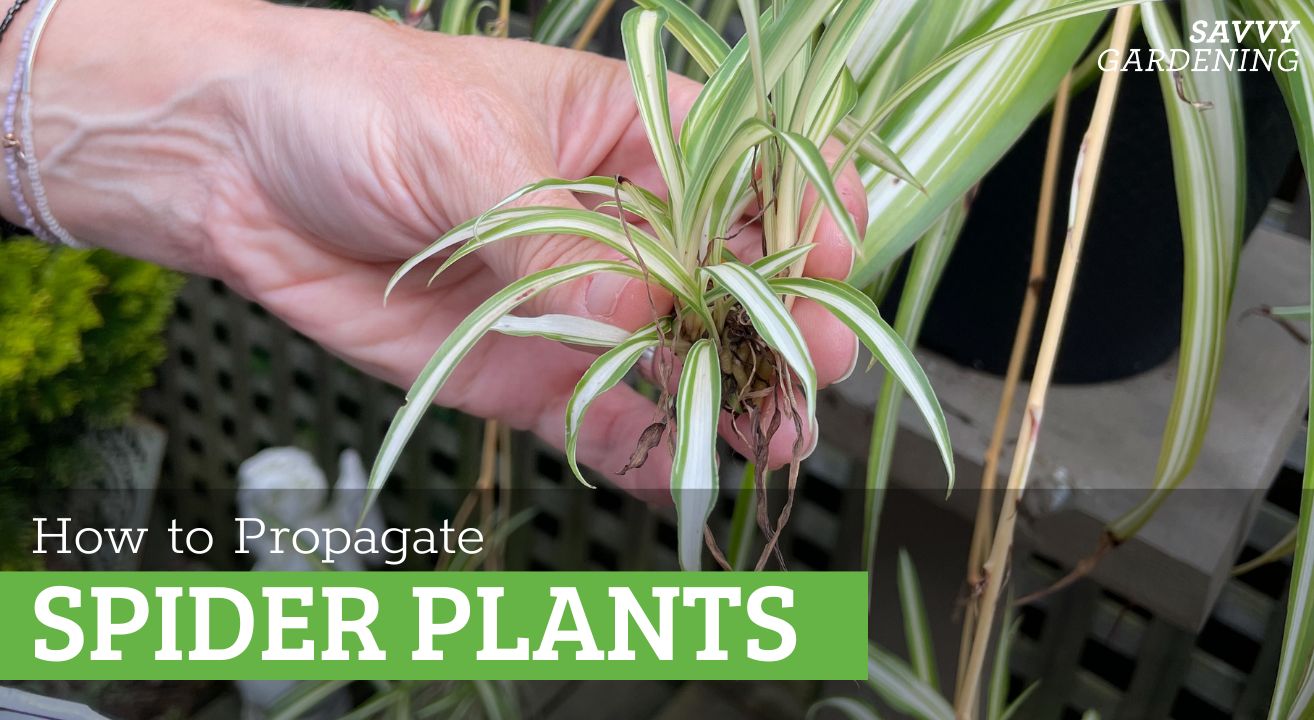
Spider plants (Chlorophytum comosum) are also called spider ivy or ribbon plants. The latter would have been inspired by the long, cascading, slender leaves. The former is likely due to those aforementioned plantlets that grow from the main plant like spiders. Long stems emerge from the plant with one or more mini spider plants at the end of each. Plants will produce several of these plantlets or pups at a time. You can leave them on the plant. Or, you can make new plants.

Why propagate a spider plant?
Propagating houseplants is an inexpensive way to grow a plant collection. They make great gifts, too. Plus, spider plants in particular are practically begging to be propagated. They produce their own baby plants at the end of runners that are easy to remove from the mother plant. In nature these runners help the plant to spread. In an indoor setting, removing them can help direct energy back to the main plant.

How to propagate spider plants in water
Whether you’re propagating your new plant in water or soil, the process is the same. Take a sharp pair of scissors or pruning shears and remove a plantlet at the base of the long stem before the root nodule. Remove any dead foliage and place the base of your spider plant in a small jar filled with a couple of inches of water.

Try to position the plant in the jar so that only the root node is wet and not the leaves. Be sure to refresh the water every few days to avoid mold from forming.
When you can see little roots coming from the base of the stem (this usually takes about a week or so), your mini spider plant is ready to be planted in soil. Please check out the next section for information on how to plant it.
Position your plant somewhere in your house that has a bright, indirect light source.

How to propagate spider plants in potting soil
Once you have removed your plantlet or pup from the mother plant, you can skip the step where you place it in water and jump right to the soil. Similarly, if your plantlet has produced roots, it’s now ready to be planted in soil. If your plantlet hasn’t produced roots in water, it will do so in a soil environment.
In a flower pot with good drainage, add pre-moistened potting soil formulated for houseplants. Use a chopstick or pencil to make a small hole and pop the plant in, root-side down. Smooth the soil around the base of the plant.

Spider plant care
Add your new little spider plant to your houseplant watering schedule. Consider bottom watering, an effect way to water houseplants, especially smaller ones that are delicate in their pot. Apparently spider plants can be affected by the fluoride or chlorine in tap water. This can cause the leaves to develop brown tips (too much sunlight or too much dryness in the air can have the same effect, as well). You could use distilled water. Darryl Cheng from Houseplant Journal talks a bit about his thoughts on brown leaf tips and whether you should be concerned about them here, which is helpful.
Snip off brown leaf tips if you’re concerned about them aesthetically. Take a sharp pair of scissors and cut close to where the leaf meets the plant.
How to propagate spider plants by division
Sometimes a plant simply outgrows its pot. If your spider plant has become too big for its pot, you can either repot it in a bigger container or divide the plant. To divide it, remove the plant from the pot. Gently see if you can pry the plant apart into two fairly equal pieces. You could also use a soil knife to slice the plant in two.
Fill a new pot for each piece with indoor potting soil and add the plant to the center. Fill in the sides with soil so there are no air pockets. Display your two new plants and water accordingly.
Leave a Reply