This post may contain affiliate links. If you make a purchase through links on our site, we may earn a commission.
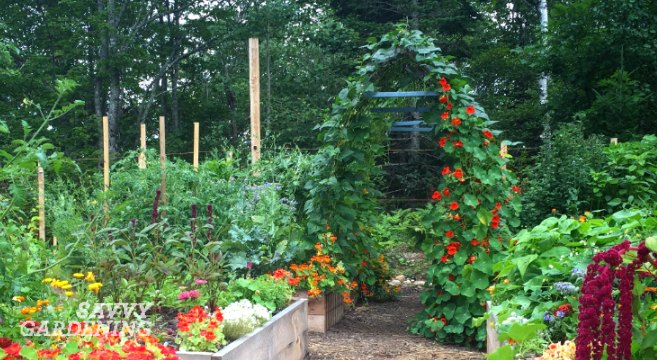
When I redesigned my vegetable garden this past spring, I knew I wanted two things; raised beds and plenty of vertical structures, including bean tunnels. Vertical vegetable gardening allows a very efficient use of space, helps prevent insect and disease problems, and adds beauty to the garden. Plus, easy-to-build structures, like bean tunnels, are so much fun!
There were, however, a few speed bumps along the way. The biggest issue was sourcing my chosen material. I could have gone with pre-made garden arches, but I was looking for something more rustic. My initial plan was to form the tunnels from 16 foot long by 4 foot wide cattle panels, which could be bent over the spaces between my raised beds to make an arch. They provide a strong support for climbing vegetables like beans and cucumbers, but they are also much cheaper than more elaborate trellises and arbors… or so I thought.

Vertical vegetable gardening; building the bean tunnels:
Once I was ready to erect the tunnels, I called around a dozen farm, building, and garden supply stores around my province, but only found one that offered the panels at a cost of $140.00 each. They also didn’t deliver and I would have to factor in the cost of a truck rental to pick them up. With four tunnels in mind, that would cost me $560.00, plus tax and transportation. Not so cheap after all.
Related post: Pole vs runner beans
With that idea scrapped, I began to look at other materials that could be upcycled for vertical vegetable gardening. In the end, it came down to the 8 foot long by 4 foot wide concrete reinforced mesh panels that I have used as trellises for years. Bonus – they cost a mere $8.00 each! I used two panels per tunnel, joined at the top with zip ties. To ensure they would be sturdy, the bottom of each panel was secured to the raised bed with a strip of wood. (see pic below).

Initially, the two pieces of mesh bowed in – not such a pretty, or sturdy structure. Knowing that this would affect their ability to support vertical crops, we installed wooden spreaders. The wood strips turned each tunnel into a gothic arch shape, which I love! They were then painted a gray-blue colour to help them blend into the foliage (the stark unpainted wood was distracting) and I quickly jotted the phrase, ‘Muster Point’ on the first piece of wood. It’s a phrase often used by the Canadian military to signify a meeting place. What better place to meet than in the garden?
Related post: Growing cucumbers vertically

The fun part – planting the beans:
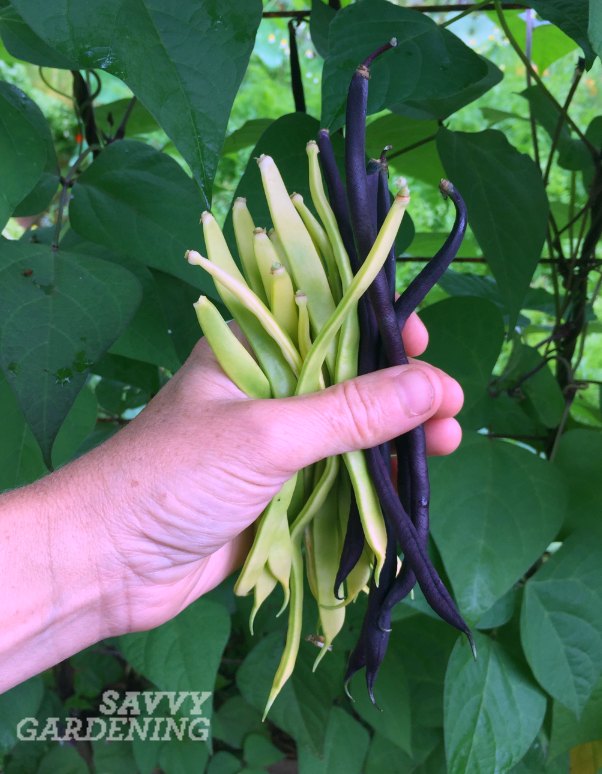
Now that the tunnels were ready for beans, it was time to get planting! I picked a handful of bean varieties; Gold Marie, Emerite, Blauhilde, Fortex, French Gold, and Purple Podded Pole. I also made another tunnel for cucumbers which is now smothered with the dense vines and dangling fruits of varieties like Lemon, Suyo Long, and Sikkim.
The bean tunnels have become my favourite shady place to sit and read. Usually when I’m in the garden, I’m working, watering, or puttering. Sitting under the tunnels has given me a new perspective on the garden and gives me a chance to really observe and appreciate the many creatures that visit the space; pollinators, hummingbirds, butterflies and more.
Do you practice any vertical vegetable gardening?

Niki I just finished installing two trellises, not tunnels, but you’ve got me thinking, at the end of my raised beds. Here in Ontario the 7×3.5 feet concrete mesh is $14.00 a piece, then I framed them with EMT 1/2 inch conduit ($6.99) secured with black zip ties and with 90 degree pull elbows ($6.20 each)at the corners. The 1/2 EMT conduit slip nicely over 1/2 rebar set in the ground at the end of beds. Sorry no photo yet. The cost was about $50.00 per trellis. The design came from One Yard Revolution (Patrick Dolan) in Chigaco.
How wide is the path between your beds where the tunnels are? My raised bed garden of 10 years has been deteriorating for the past year and a half. This year I am redoing half of it, next year the other half. I plan to do the same with my vining plants (I liked the idea ever since I bought your year round gardening book a few years back). I keep enlarging my garden plot, and have added espeliered apple trees, dwarf blueberry bushes and black berry bushes on the outsides of the garden fencing. These trellises you designed will make my space more efficient! Thanks for your books and blog!
I have five feet under the tunnels.. In one of my older posts Niki’s Big Dig (http://savvygardening.com/vegetable-garden-design/), you can see the design for my garden. And thanks for your kind words about my Year-Round Vegetable Gardener book! Your garden sounds wonderful.. feel free to post pics here in the comment section anytime. We’d love to see you garden! – Niki
I would like to try your tunnel method for cucumbers. The cattle panels seem like a great idea. When I did a search on them I saw one that is 8ft L x 50 in. H. Is that size ok to get?
Those are the same size that I bought.. although my panels weren’t labelled as cattle panels, they’re called ‘concrete reinforcement mesh sheets’. Cheap and effective! Would love to see pics if you do this 🙂 – Niki
You can also get them 50 inches by 16 feet for about $30 here in NE Ohio . That’s that we used going from the ground up. Need 1 more to go between the raised beds.
Great, Niki! Thank you! (Also enjoyed your recent interview on A Way To Garden recently!) :)))
Anytime! 🙂 And I’m glad you liked the interview! Margaret is so much fun!
Hi Niki!
This is beautiful! I’m also admiring your red nasturtium vine. Can you tell me what type of nasturtium that is? I love how you also have them tumbling out of your beautiful cedar beds also.
Hi Wendy – thank you so much! That is a ‘Spitfire’ climbing nasturtium from Renees Garden Seeds. 🙂 – Niki
I usually grow my poke beans on a teepee, but you’ve given me some ideas…
Thanks Dave!! 🙂
My cantaloupe vines (all started from store bought cantaloupe seeds) are trained to grow up my metal gazebo. I don’t know how much shade they will provide, as this is the first year I’ve tried this. But so far they’ve very pretty & the little yellow flowers attract hummingbirds & butterflies.
In the past, when they grew in whiskey barrel planters, I even got a couple of small, sweet cantaloupes!
I think you were priced pipe corral cattle panels, designed to be used as fencing. The wire fencing would be cheaper.
Just discovered your blog through A Way to Garden, really like it! SLR
2020 now…. panels are 20-25 dollars for wire, 16’x50” at local Tractor Supply Store. OMaha.
Wait?! What?! Those panels are $24 each here. I fenced my entire yard at our old house. Granted this was in 2008… Now the gate panels and the tubular steel ones are that price. But the mesh shouldn’t be that high!!
I agree!! Several of my garden writing friends say they paid between $20 and $35 for their cattle panels, but the price from the farm supply company I contacted was firm.. I have no idea how anyone uses them for fencing – way too costly! – Niki
I love these tunnels. My question is how much shade do they cast over the other beds? My garden is small (four raised beds) and does not get full sun. It gets morning sun, shade early afternoon and then sun again late afternoon until just before sunset when the sun slips behind the roof of the houses on the hill across from me. I would love to add this beauty and have a great way to grow bean and cucumbers. Thoughts???
Great question!! Thanks Joanne.. they do cast shade, but I chose crops for those areas that thrive in summer shade – lettuce, spinach, chard, etc. If you did a tunnel, I would put it on the north end of the garden where it would cast the least amount of shade on your other beds 🙂