This post may contain affiliate links. If you make a purchase through links on our site, we may earn a commission.
Whether you’re growing food, flowers, or (like me!) a mixture of both, Vegepods are an easy and low maintenance way to garden. I’ve been gardening in a Vegepod for over a year and it’s become my miniature food factory, conveniently located just outside my kitchen door. Self-watering, raised bed planters like Vegepods allow you to grow a lot of food in a small space, weed-free, and with minimal pest or disease damage. To share more of the benefits of gardening in a raised bed planter, we’ve teamed up with Lee Valley, a go-to store for American and Canadian gardeners.
Vegepods 101
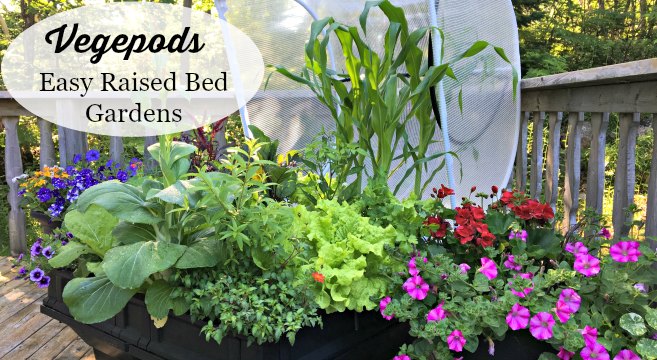
I’m now in year two with my Vegepod planter, and have grown dozen of types of crops in this compact space. Last spring I started with hardy greens, like kale, spinach, and arugula, which were followed by heat-loving tomatoes, peppers, basil, and corn. Yes, corn! It grew over seven feet tall in the Vegepod and we harvested tender, sweet corn in mid-summer. Once the summer crops were finished, they were removed and I planted cold-tolerant greens and radishes for late fall and winter harvesting. With a little planning, you can succession plant a Vegepod several times over the season.
Three stand-out features of Vegepods
1) A Vegepod for every sized space
There are three sizes of Vegepods available through Lee Valley; small, medium, and large. I have the medium-sized Vegepod, which offers 39 inches by 39 inches of growing space (10.6 square feet). The small one is 19 inches by 39 inches (5.1 square feet), and the large Vegepod is 78 inches by 39 inches. That’s over 21 square feet of growing space!
There is also an optional galvanized steel stand for each size of Vegepod, which raises the height of the planter to 31 inches, a comfortable height for planting, tending, and harvesting.

2) A self-watering system
Savvy gardeners know that self-watering containers and planters are the easiest way to grow plants on decks and patios. And for me, this is one of the best features of the Vegepod. My medium-sized Vegepod holds 8.5 gallons in the water reservoir, while the small version holds 4.2 gallons and the large holds 16.9 gallons. This means less watering for you!
It’s also peace of mind if you go away for a weekend and can’t water, or during periods of hot, dry weather. As the soil dries out, the water in the reservoir is wicked up into the Vegepod and becomes available to your plants.

3) Convenient covers for crop protection
The hinged, removable top of a Vegepod not only provides protection from pests and weather, but it also has a misting line that hooks up to a hose or other water source for easy irrigation. Use this feature to keep crops watered or newly planted seeds moist. There are two covers that come with the Vegepod; a mesh top and a PVC cover:
- Mesh cover: The lightweight mesh cover is permeable and allows sunlight, air, and water to reach your plants. It does offer some protection from frost, but also from harsh spring weather – high winds and hail, for example. It’s also an easy way to prevent pests, like cabbage worms, rabbits, deer, or birds, from munching on your homegrown harvest.
- PVC cover: If you’re a year-round vegetable gardener like me, you’ll appreciate this 12-millimeter-thick PVC frost cover. It slides right over the mesh cover for early spring, autumn, or winter protection. It turns the Vegepod into a miniature greenhouse and allows me to grow hardy vegetables, like kale, spinach, and Asian greens, well into winter. In fact, our kale lasted the entire winter with this simple layer of protection (I’m in zone 5).

Vegepod growing tips
Vegepods make for pretty easy gardening, but to get the most from your space, consider the following growing tips.
- Look for the light. Most types of vegetables and herbs grow best when planted in full sun. Therefore, if you want heat-loving crops, like tomatoes, peppers, beans, cucumbers, and basil, find a sunny spot to place your Vegepod. If you don’t have an area that offers at least eight hours of full sun, stick to planting vegetables that can grow in less light.
- Pay attention to the soil. Because a Vegepod is essentially a large container, be sure to use a high-quality soil-less mix as the planting medium. I also added several bags of compost and a slow-release organic fertilizer before planting.
- When to water? I love that I only need to water my Vegepod every few weeks – three cheers for self-watering planters! – but, if you’re not sure when it’s time to water, just stick a finger into the soil in several places in the Vegepod. If the soil feels dry to the touch several inches down, it’s time to get out the watering can.
A big thank you to Lee Valley for sponsoring this post. The Vegepod is available at Lee Valley stores across Canada, as well as on the Lee Valley website in both the US and Canada. To order a free Lee Valley catalog, or to find your closest store, click here.

Leave a Reply