This post may contain affiliate links. If you make a purchase through links on our site, we may earn a commission.
I first planted New Zealand spinach in one of my raised beds and I’ve never had to replant it since. Little seedlings dependably reappear in my garden every year. I didn’t know much about this healthy leafy green until a friend offered me a few extra seedlings she had growing in her garden. Always keen to try something new, I eagerly planted them in the garden.
Besides salad greens, I love growing a selection of tougher greens I can cook with in my raised beds, from kale and Swiss chard to pak choy—and New Zealand spinach. Read on for tips on growing this yummy spinach that’s not really a spinach (I’ll explain below) from seed.

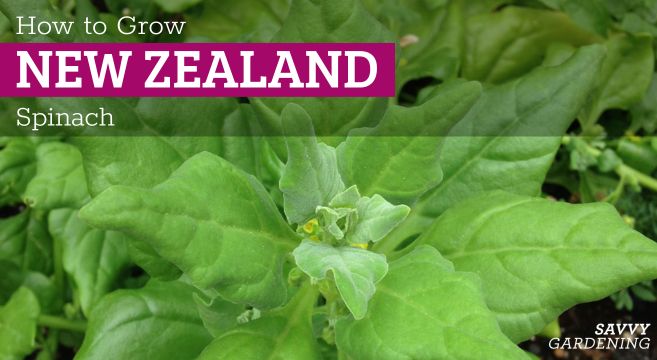
So what is New Zealand spinach?
While it might pass the Popeye test in terms of nutrition, New Zealand spinach (Tetragonia tetragonioides) isn’t actually part of the spinach family. However I do use the tender young leaves as a spinach substitute. They have a pretty similar mild flavour. Like spinach, it’s recommended that you cook the leaves to remove the oxalates. The plant originates in New Zealand, Australia, and Asia and is considered a perennial in those warmer climates. Here in North America, it’s grown as more of a tender annual, but depending on your zone, it could overwinter. Unlike spinach, which is more of a cool weather veggie, New Zealand spinach thrives in the heat.
New Zealand spinach is considered to be an heirloom vegetable. Apparently Captain Cook and his crew ate it to prevent scurvy in the 1700s. The plant grows along both the shorelines of Australia and further inland in woodland settings. Because of these voyages, it was the first Australian vegetable to be cultivated in England—botanist Sir Joseph Banks brought seeds back with him. Some will argue it’s actually better than spinach.

Sowing New Zealand spinach from seed indoors
If you’d like to give seeds a head start indoors under your grow light system, plant them about three to four weeks before the last frost date. New Zealand spinach seeds remind me a bit of beet seeds in their size and shape. Soaking them before planting for 24 hours in water that’s at room temperature will help with germination.
Sow seeds in a seed starting mix about a half an inch (about 1 cm) deep. Keep the soil moist (I use a mister to avoid disturbing the soil) until the seeds have germinated and seedlings start to grow. (Plants take about 55 to 60 days to mature.)

Direct-sowing seeds in the garden
Because New Zealand spinach is a heat lover, temperatures need to be pretty warm before you can direct-sow seeds outside. Sow them in May or June, once temperatures are consistently above 50° F (10° C). Choose a spot in your garden bed where plants will have a bit of space to spread. If you want your plants to reseed and come back every year, plant your seeds or seedlings in a space where they won’t interfere with other plants once they start to grow.
Make sure your garden gets at least eight to 10 hours of sun in a day. You’ll want to plant seeds or seedlings in nutrient-rich soil that drains well (don’t forget these are drought-tolerant plants!). It’s okay if soil is a bit sandy. You may want to generously amend the soil before sowing seeds or planting seedlings. Partway through the season, side-dress your rows with compost.
Sow seeds (after completing the soaking method mentioned above) about three to four inches (7.5 to 10 cm) apart in rows that are about 12 inches (30.5 cm) apart. To give the plants space to grow, you may want to thin them further to about 10 to 12 inches (25 to 30.5 cm) apart. Don’t let those young plants go to waste. Bring them inside to steam or add to a stir fry. If you find some seeds haven’t germinated, plant extra seeds in the spaces that have been left bare.

Caring for plants throughout the summer
Though New Zealand spinach is a heat lover and accustomed to a hot and humid climate, you might find the leaves will taste less bitter if they get a little bit of shade sometime throughout the day. Watering plants regularly will help leaves to maintain their flavour, too.
New Zealand spinach plants are pretty unbothered by pests and diseases. Fertilizing plants regularly and generously with a 10-10-10 formulation will prevent plants from going to seed too early in the season.
Plants can reach about a foot tall and sprawl outwards, as well. The latter kind of reminds me of purslane plants in that respect.
Plants will tolerate a very light frost—I’ve harvested right through the fall—but a hard frost will do the plants in. My garden is also in a bit of a protected spot, so they might not tolerate frost in a more exposed garden.
Harvesting New Zealand spinach
Like other greens, New Zealand spinach is highly nutritious. I have used it in stir fries, steamed over rice, stuffed in squash as a spanakopita filling, and to add some healthy veggies to a soup broth. When I’ve looked up recipes to use up my New Zealand spinach, I’ve also found it referred to as warrigal greens or Botany Bay greens. Apparently it’s quite a popular green among top chefs.

Using a sharp pair of herb scissors, I will snip young leaves or side shoots off the main stem. Just like herbs, regular trimming encourages plant growth and bushier plants. Prune off the bigger leaves that you might not end up eating.
I have found that when I let plants go to seed in the fall, they’ll reseed the following spring. I have a bit of a New Zealand spinach “patch” on the go where I avoid planting other plants because I know I’ll find seedlings poking through the soil at some point in the spring.
Some volunteered on our canyon hill. We let it grow and collect the leaves whenever we pass by this spot. We cook both the big and little leaves with curry spices and salt. Having it curried with scrambled eggs and cheese for breakfast. Thanks for sharing you article!
Sounds delicious! Thank you for sharing. 🙂
I live in NZ. This stuff grows everywhere, once you plant it you will never get rid of it – both a good and bad thing, just be aware when planting it! We eat it raw or cooked, it has a thicker, more robust texture than regular spinach.
I’ve had no luck with these seeds yet. Tried starting indoors in dirt, hydroponically, and direct sowed in my raised beds and no luck. Maybe not enough Sun?
That’s definitely possible. I did find they didn’t do as well in one of my raised beds that got more dappled shade.
This stuff has been going crazy in our unheated greenhouse during the winter. It was planted last spring.
It’s now the end of January, we live in northern Utah. Harvested a huge bowl of it today to add to our daily salads.
First timer. Enjoyed your post.
I thought I’d try it in a couple of buckets. Yikes, I’ve run out of space in my small ground garden and have no raised beds.
Planted some and they quickly took over the garden box. They are tasty but you need to thin them out as they do spread
This is called chilli bite bajaya leaves very nice to eat
Hi Tara,
I am relatively new to your blog and am greatly enjoying your gardening newsletters. Because of this post and one of Niki’s on red veined sorrel I am planning to give these new greens a try this growing season. Also, Could you please tell me how to access past articles?
Is there an index somewhere on your blog? I must admit I am now technologically savvy but hopefully I will learn how to utilize the information you send.
Thank you so much, Janie
Hi Janie, Welcome! If you click through each category and sub-category, you will find all of our archived content from the last few years.
So this would not be suitable for a ‘spinach’ salad?
Hi Sabrina, In the article I link to near the bottom (from “warrigal greens,” it mentions how you should blanch the leaves and refresh in cold water. But the pesto recipe talks about reserving the baby leaves and making a salad from them. I found the article below when I was writing the article that says to blanch the big leaves and eat the small, younger leaves raw. I would say proceed with caution accordingly. https://www.gourmettraveller.com.au/recipes/explainers/warrigal-greens-17037