This post may contain affiliate links. If you make a purchase through links on our site, we may earn a commission.
Kale is one of my favorite vegetables to grow. These versatile greens can be steamed or stir fried, chopped into soups, or baked into chips. And the young leaves are delicious in salads. It’s a perfect double-duty plant, because it adds interesting foliage in various shades of green to a garden or an ornamental container, with the added bonus of being able to harvest some of the leaves. Plus it’s super-healthy. Kale is a good source of fiber and high in vitamin C. Learning how to grow kale is pretty easy. Unfortunately its nemesis, the cabbage worm, can crush—or rather eat—all your kale-growing dreams very quickly. Here are some tips on raising healthy kale plants.

Varieties of kale to grow
There are many different varieties of this member of the Brassica family (Brassica oleracea, to be exact), which also includes broccoli, cauliflower, kohlrabi, Brussels sprouts, and cabbage. Niki has detailed 14 types of kale to help you figure out a favorite.
My favorite varieties of kale include Vates, a curly variety. Curly kale has these wonderful, ruffled leaves. When I use it, I cut around the tough stems and toss them in the compost. If I’m stir frying the leaves, I find sometimes the curls become a bit crispy, which adds a nice crunch to a dish. If I eat the leaves raw, I pick them when they’re small small so they’re sweeter.
Lacinato kale, also referred to as Tuscan or Dinosaur, has those longer, narrow crinkly-looking leaves. It’s delicious steamed and stir fried. It’s also really striking in a garden.
When shopping for kale seeds, you can find a range of hues and leaf shapes among the different varieties, from the purple-red veins and blue-green leaves of Red Russian, to the rich purple-red of mature Redbor kale.

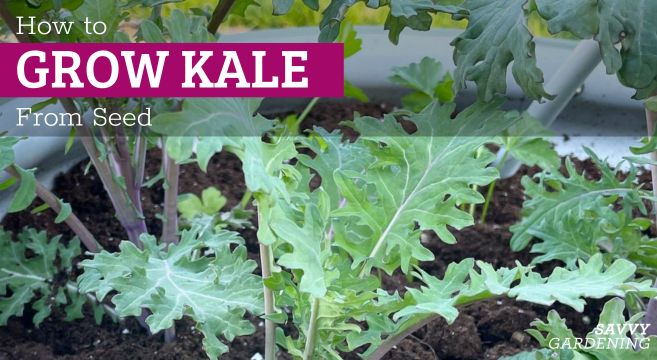
How to grow kale from seed
In the past, I’ve bought kale seedlings in the spring, but nowadays, I grow my kale from seed. I’ll direct-sow it in one of my raised beds in March or April, depending on the spring we’re having. Kale is cold tolerant and prefers temperatures, between 55 °F and 75°F (13°C to 24°C). You can sow seeds closer together if you’ll be harvesting for baby kale leaves. Read the seed packet carefully to determine how big mature plants will get, so you can determine spacing accordingly (usually about 45 to 60 cm [18 to 24 inches apart]).
I’ll also sow kale seeds under my grow lights to give it a head start. My grow light stand has a capillary mat and reservoir, which waters from underneath. If my seeds aren’t sown in that setup, I use a mister spray bottle to water the seeds in their cells or small pots, so the seeds and subsequent delicate young seedlings don’t get washed away.

How to grow kale from transplants
Kale itself is full of nutrients, but it needs lots of nutrients to grow, especially nitrogen. Add a layer of compost (about two inches) to the vegetable garden before planting. I top-dress my raised beds with compost in the fall, so they’re ready for early-spring sowing and planting.
Whether you’ve purchased seedlings, or grown your own, use a chopstick to gently tease your seedling out of the cell pack or tray and plant it in the garden in an area that gets full sun. Kale will grow in partial shade, but I’ve found it does better with more sun. Keep your seedlings well watered and watch for pest damage. Fertilize regularly as part of your summer routine using an organic fertilizer.
Growing kale to add to ornamental arrangements
Often you’ll see ornamental kale varieties at the garden center, especially in the fall, to be used in autumn arrangements. I like to grow my own foliage. I usually pop a couple of kale plants out of my garden to add to my pots. They add a lovely texture to my containers. Before the winter, I dig them back into my raised bed. That’s how I got my kale plant with the bark on it, as shown below.

Dealing with kale pests
The aforementioned cabbage worms are the main pest I’ve dealt with on my kale plants. Apparently groundhogs are a healthy bunch, because my friend caught one eating her kale in one of her raised bed containers. I’ve also had deer munch on some of my kale plants.
A few years ago, I was on a PBS gardening special called Growing Wisdom. It featured my upcycled lettuce table where I’d planted a variety of baby salad greens, including baby kale. In between takes, I looked down at one point and tried not to reveal my absolute horror that the kale leaves were absolutely covered in wee cabbage worms. I hadn’t noticed because they were only on the row of kale plants! Luckily the camera didn’t notice either.

Cabbage worms can do a lot of damage in a very short period of time. Jessica has an article with some great tips for dealing with cabbage worms. Inspect young seedlings regularly and carefully, especially if you see small bits of leaves start to disappear.
Cabbage aphids are also a nuisance, especially when you go to harvest kale only to discover the leaves are crawling with tiny bugs. Ew! A heavy blast from the hose can help remove them, though you may not want to eat the affected leaves. You can also try companion planting to attract beneficial insects, like ladybugs, which eat aphids, among others.
Protecting your kale crops with row cover
I often plant kale under lightweight floating row cover. When I wrote my first book, Raised Bed Revolution, I added 1/2-inch conduit clamps to the inside lengths of one of my raised beds that could accommodate 1/2-inch pex pipe. This flexible material can easily be cut with an xacto blade and forms a perfect semi-circle that when inserted into the clamps, creates a mini hoop house. I use lightweight floating row cover that lets sunlight and rain through. I hold the ends in place using spring clamps around the edges of the raised bed.

My original intention was to use this bed as a season extender, but I got quite tired of both squirrels digging up newly planted seeds, and the cabbage moths swooping in to lay their eggs. Now the raised bed protects all the Brassica crops I planted in the spring throughout the summer months.

How to harvest kale so it keeps growing
Like lettuce, kale falls into that cut-and-come-again category. You don’t have to pull the whole plant or wait until it’s “ready.” You can keep harvesting the outer leaves at the base of the stem (I use my garden scissors). The plant will continue to grow new leaves in the center of the plant.
Baby kale is a delicious salad green. And it may sound a bit nutty to massage your greens, but I will say that massaging kale leaves—especially the bigger ones—works to make them much more tender and palatable when eaten raw. Kale is great for the freezer, too. Here’s advice on how to freeze kale for later use.

How to grow kale—and overwinter it for a second season
Many gardeners grow kale as an annual, but it’s actually a biennial. Depending on where you live, kale can overwinter. It also doesn’t mind the cooler temperatures and in the fall, it can taste even sweeter after a frost.
Generally, to overwinter kale, you might want to cover it or plant in a protected area. Living under an escarpment, I’m in a bit of a protected zone, so I once had a kale plant live to be about three years old without winter protection! The leaves died back in fall, but came back in spring.

Besides my raised beds, I have grown kale along the side of my front garden for winter harvests. The cement provided a bit of warmth and protected my crop, but I also covered it in floating row cover for winter protection.

The new growth slowed considerably, but I was harvesting kale on winter days. Then in the spring, the plant started to become productive once more before growing flowers and going to seed.

In its second year, a kale plant grows really lovely yellow flowers that attract bees. If you don’t want to wait for the flowers to bloom, the unopened buds taste like broccoli. Simply pinch them off and add them to salads and stir fries. The flowers are edible, too—toss them in your salad for an ornamental topping.
Can the outer leaves of kale be eaten?
The kind of round ones.
Hi Jeanette,
Yes, you can eat the outer leaves, however the longer they’ve been around, the more bitter and/or tougher they become. Those ones are better for making kale chips or perhaps stir frying.
I tried Kale in my garden, the cabbage worms got it in late July, but are not really around much before the 4th. However I didn’t like the overly fibrous quality of the vegetable. I found a Japanese green called Komatsuna that is much easier to grow and did well in central Illinois. It is a 60 day crop so is done before the cabbage worms come and is much more tender and sweet. I tried some other Asian greens but they bolted too quickly in the spring. Komatsuna turned out the most suitable for my climate.
Hi! Thank you for the great information in this article! Can you tell me what type of kale the picture of the seedlings is (red pot, grown in the “salad bowl”?
I appreciate it!
Lindsay
Thanks, Lindsay. It’s a container variety from Renee’s called Green Curls. 🙂
We’re into our second year with our kale plants which are under poly tunnels. They’re growing so tall they’re struggling to fit. If we cut the tops of the main stem down will it kill the plant? They’re so healthy otherwise.
Hi Kate,
The growth comes from the middle, so cutting the top off will prevent further growth.
Hi Leah, Last winter some of my kale plants, planted against a stone garden wall survived under floating row cover. These are the ones that bloomed for me this past spring. You can plant in an unheated greenhouse, but a garage may work if there are windows and the plant will get some light.
I really want to save the kale seeds, but I am in zone 5 where has extremely cold winter. My kales always died away in late fall. Is there a way to survive kale through the harsh winter, so next year, the plants will produce flowers to seeds?
By the way, I might try to dig whole kale out during the fall season and leave it in the garage, is it feasible? If yes, do I need to water it? What temperature should be ok to save the plant?
Thank you.
I’m in zone 5b and many but not all of my kale survived the winter under plastic (mini hoop house in a raised bed). I lifted the plastic and watered maybe 3-4 times during the winter. I conlcude that they can survive the cold but will break apart due to wind, snow, etc if not covered. I pulled the plants around june 15 and let the seed pods dry and used this for seed.