This post may contain affiliate links. If you make a purchase through links on our site, we may earn a commission.
Coneflowers (Echinacea species) are a favorite perennial of millions of gardeners, and growing Echinacea from seed is fun and easy, if you follow the strategies I’m about to share. In this article I’ll introduce 3 methods of planting Echinacea seeds and the correct timing for each technique. With a little patience and forethought, you can grow hundreds of coneflower plants for the price of a single packet of seeds.
About Echinacea
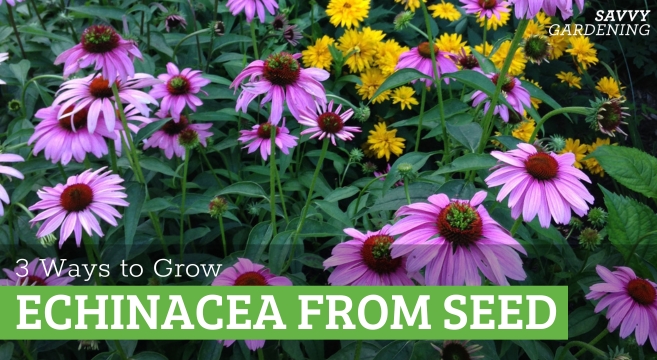
Before we dive into seed planting techniques, let me introduce you to this wonderful plant. There are just under a dozen different species of Echinacea and all are native to North America. The most popular species is the purple coneflower, Echinacea purpurea, though the pale purple coneflower (Echinacea pallida) and the yellow coneflower (Echinacea paradoxa) are two of my personal favorites. There are also dozens if not hundreds of different hybrids and cultivars, most created by plant breeders, with more entering the market every year.

All Echinacea species have distinctive daisy-like blooms with a cone-like central disk that come in shades of pink, purple, yellow, orange, red, and white. They are a drought-tolerant hardy perennial and a welcome mat for pollinators, such as bees and butterflies, and other beneficial insects. Echinacea is also often grown by herbalists and used as a traditional medicinal plant to fend off cold and flu symptoms.
Why you should be growing Echinacea from seed
Purchasing mature coneflower plants at the nursery can be an expensive proposition. A plant in a gallon-sized pot could cost $20 to $30. Growing Echinacea from seed is so simple and cost effective, I’m always surprised that more gardeners don’t try their hand at the task.
Aside from your ability to grow many Echinacea seedlings for the price of one plant, there are other benefits to growing from seed as well. Sourcing locally grown seed means your plants will be better adapted to your local growing conditions. Plus, growing from seed means you can extend your collection to Echinacea varieties that aren’t typically found at nurseries, such as the two favorites I list above or the previously endangered Tennessee coneflower (Echinacea tennesseensis).

The main downside of growing Echinacea from seed is the time it takes for the plants to be mature enough to flower. Seed-grown Echinacea plants almost never produce a flower bud their first year. This herbaceous perennial needs to go through a vernalization period as a young plant in order to flower. Vernalization is the passage of a winter season. So don’t expect to see flowers until at least the second season when growing from seed.
Now that you know why you should be growing Echinacea from seed lets talk about how to do it.
Three methods for growing Echinacea from seed
Unlike growing a tomato or a sunflower from seed, growing Echinacea from seed requires a bit more finesse then simply sinking a seed into soil and waiting for it to grow. Echinacea seeds require cold stratification in order to break dormancy and germinate. Stratification is a period of moist, cold conditions. For coneflowers, the seeds need to go through a period of about a month where temperatures are at or below 40°F. During that time, the seeds should be in a moist substrate such as soil, sand, or vermiculite. While this may sound complicated, I promise it isn’t. I share detailed instructions on how to satisfy this stratification requirement in each of the three methods I introduce below.
The three methods are:
- Sow Echinacea seeds indoors under grow lights
- Sow the seeds outdoors using a method known as winter sowing
- Direct sow the seeds right into the garden in the fall
Let’s talk about all three methods in turn.

Sowing Echinacea seeds indoors under grow lights
Though I consider this to be the most complicated method of growing Echinacea from seed, it is also the one where I see the highest rates of germination since the environment is so controlled. Echinacea plants grown indoors typically have good germination rates. Here’s how to do it.
- In early to mid winter, take the seeds out of their packet and put them in a plastic baggie with a tablespoon of sand or vermiculite. Add a half tablespoon of water to the bag and shake it up. Put the bag in the back of your refrigerator or in the freezer for a month.
- When the month (or a little more) has passed, fill seed starting trays or pots with sterile seed starting mix (find our DIY seed starting soil recipe here). Sow the coneflower seeds by broadcasting the sand and vermiculite mixture over the surface of the soil. Cover the seeds with a very light layer of potting soil or sand (less than ¼”). Water them in.
- Place a plastic dome or plastic wrap over the tray or pot and put it under an indoor grow light that’s positioned 3-4” above the top of the pot. Leave the lights on for 14-16 hours per day.
- Echinacea seeds take 10 to 20 days to germinate, sometimes longer. As soon as a few seeds germinate, remove the plastic covering. Continue to water the tray or pot regularly. Do not allow the potting soil to completely dry out.
- Once the seedlings have their second set of leaves, transplant them into slightly larger containers using regular potting soil. Continue to grow indoors until after the danger of frost has passed when they can be transplanted outdoors.

Growing Echinacea from seed outdoors by winter sowing
The second method of growing coneflower seeds is using a process known as winter sowing (we share more specifics about winter sowing here). This is my preferred method as it does not require you to keep the seed and sand mixture in your fridge or freezer. It is also a near hands-free method of starting seeds. Winter sowing takes place anytime from mid- to late winter.

Here’s how to do it:
- Cut a ring around an empty milk jug, about 3 to 4 inches up from the bottom, leaving the portion just below the handle attached so it opens like a hinge.
- Poke a few holes in the bottom of the jug for drainage, then fill the bottom with 3 to 4 inches of potting soil. Sprinkle 8 to 10 Echinacea seeds onto the surface of the potting soil and cover them with a very light dusting of potting soil or vermiculite. Water them in.
- Close the hinge and seal the jug closed at the seam with a piece of duct or packing tape. You can leave the lid off the jug or keep it on, and use a permanent marker to write the variety name on the outside of the jug.
- Place the jug in a partial shade to full sun area for the rest of the winter. Don’t worry about snow, ice, or other harsh weather. Remember, those seeds are being stratified!
- When the conditions are right, the seeds inside will germinate. Remove the tape and open the hinge on very warm spring days and then close it again at night. Add water if the moisture level of the potting soil is too dry.
- Once the seedlings reach a few inches high, transplant them out of the jug and into separate pots. Or plant them directly into the garden.

Fall sowing of Echinacea into the ground
This third method of growing Echinacea seeds is as easy as can be. However, it’s also the riskiest because the seeds can easily be eaten by mice, voles, or other critters. They may also wash away or otherwise succumb to nature. The germination and success rate may be lower, but fall sowing is as close to the way nature intended as you can get.

This method mimics what would happen if the dead flowers were left to mature into seed heads, naturally dropping their own seeds. With natural self seeding like this, the seeds sit on the soil for the winter, where they automatically undergo the necessary cold moist stratification. You can grow more coneflowers this way simply by failing to deadhead your existing Echinacea plants. But, if you want to plant seeds of a different coneflower variety than the one you’ve already got, here’s how to mimic this natural process.
- Choose a site that receives full sun with well-drained soil high in organic matter.
- After a hard frost in northern growing zones or before the arrival of the rainy season in warmer climes, sow seeds directly onto the garden soil.
- You can either lightly scratch the seeds into the surface of the soil with a rake, or toss a few handfuls of finely screened compost or garden soil over them. Do not cover them with a heavy layer.
- Walk away and enjoy your winter.
- In early spring, the seeds will germinate when they’re ready. If necessary, separate the seedlings when they are 2 to 3 inches tall by transplanting them to new spots in the garden.

Extra tips for growing coneflowers
Here are a handful of additional strategies for success when growing Echinacea:
- Don’t add fertilizer to coneflowers as it weakens their stems and causes them to flop. They are tough, resilient plants that thrive on leaner soils.
- Mulch plants with an inch or two of shredded leaves to reduce watering and competition from weeds.
- Pests such as aphids and slugs can sometimes be problematic. Here are some of my best slug-control tips. Aphids can be removed by hand-squishing or knocking them off the plants with a sharp stream of water from the hose.
- Occasionally powdery mildew can strike susceptible varieties. Give the plants plenty of room to maximize air circulation around them and reduce their chances of developing the disease.
- Aster yellows is a bacterial disease spread by a species of leafhopper. If your Echinacea plant develops symptoms (deformed, yellow growth, thickened stems, malformed flowers, etc), destroy the plant immediately and throw it in the garbage to prevent the pathogen’s spread.
- Echinacea make great cut flowers. Don’t forget to enjoy the blooms indoors, too!

Coneflower Power
Whether you grow this perennial plant for its beauty or its medicinal properties, I’m sure you’ll find growing Echinacea from seed as fun and easy as I do. Try all three of these methods and then choose the one that’s best for you. Before you know it, you’ll be enjoying a rainbow of colorful blooms each and every summer.
For more on growing beautiful perennial flowers, please visit these articles:
I didn’t see this mentioned or maybe I missed it. Having just seeded over 100 plus seeds, I know this works……If you crush the seed covering like cracking a peanut, you will find a perfect seed inside, that once exposed to a wet paper towel, will germinate in a couple days. It also weeds out the non viable seeds. I use a dental pick to help expose the seed and transfer to my soil.
Thanks so. much Peter!
Wish me luck! I have 1000s of seeds.
I am enjoying my plumeria garden and it very satisfying.
Did you have to stratify them first?
If you grow them using the winter sowing technique or outdoor sowing in the fall, you do not need to pre-stratify the seeds as the outdoor temperatures will naturally fulfill that requirement. If you grow them indoors under lights, you’ll need to check with your seed supplier to ask if the seeds are pre-stratified. If they are not, you’ll need to keep them in the fridge for four weeks prior to planting them.