This post may contain affiliate links. If you make a purchase through links on our site, we may earn a commission.
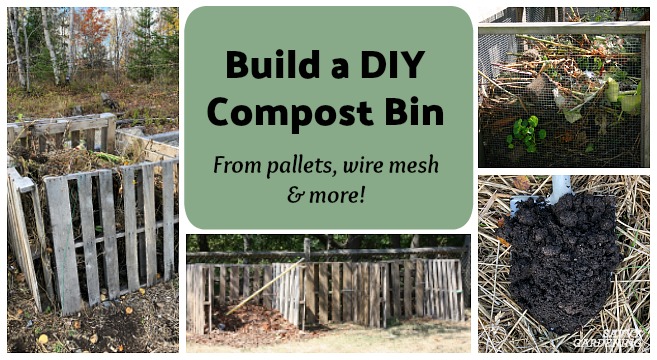
There’s no need to spend big bucks on a fancy composting system when a simple DIY compost bin will transform kitchen and garden waste into a rich soil amendment. And, with a little elbow grease and a few basic materials like pallets or chicken wire, you can quickly and easily build an effective compost bin.

The basics of composting
I’m not going to spend a lot of time discussing the science of composting when Jessica did just that in this excellent post. Instead, I want to focus on the various types of DIY compost bins you can build and the best materials to use. However, those new to composting may wonder if it’s worth the effort. To that I say, yes! There are many benefits to making your own compost:
- Composting allows you to make FREE food for your soil! Why put a bounty of organic materials like fall leaves, kitchen scraps, eggshells, and garden waste on your curb for the city or town to pick up when it can be used to make a high-quality soil amendment.
- Making your own compost saves money as it eliminates or reduces the need to buy compost.
- A compost bin allows you control the ingredients that go into your finished compost. There’s no need to wonder what types of materials are going into your garden beds and containers.
- Home composting reduces your environmental footprint as there are fewer materials sent to landfills or incinerators.
Types of DIY compost bins
You can make compost bins from a wide variety of materials including straw bales, a wine barrel, or even make a DIY compost tumbler, but these three DIY compost bins below are among the most common and easiest to make.

A pallet compost bin
I recently built a new compost bin using a small pile of pallets I’d accumulated at the back of my garden. The pallets were all the same size and untreated. How can you tell if pallets are untreated? Look for those stamped with HT, which means ‘heat-treated’ and avoid those stamped with ‘MB’ as they have been sprayed with the toxic fumigant, methyl bromide.
Besides being quick and easy to build, a pallet DIY compost bin is also a good size for decomposition. Many plastic bins measure just 28 to 36 inches across, which is on the small size if you want the compost pile to heat up quickly. A standard pallet is 48 by 40 inches and makes a bin that is large enough to cook quickly and small enough that air can still reach the center of the pile.
I also like that wooden pallets have spaces between the slats to permit air flow. Air circulation is vital for aerobic decomposition in a compost pile and many of the plastic bins you can buy lack adequate holes or vents.
To build my pallet compost bin I used five pallets – one for each side and one for the bottom. Alternatively, you can use four pallets with the bottom open to the ground. I used twelve-inch long zip ties to lash the pallets together with the bin finished in fifteen short minutes! You can use strong twine or cord instead of plastic zip ties if you prefer. The front pallet was only secured on one side so that it swings open like a door. This makes it easy to turn the pile or harvest the compost. I try to turn my compost every week or two, using my handy garden fork.
For a sturdier bin, or if you’re securing several bins together to create a multiple bin compost system, you can attach the pallets using metal brackets like these ones.
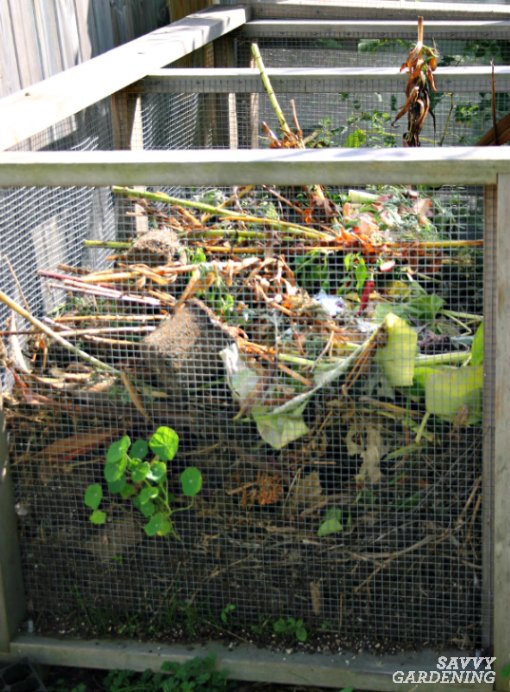
A wire mesh compost bin
I’ve been using DIY wire mesh compost bins for years! They’re quick and easy to build and the perfect way to turn all those wonderful autumn leaves into rich leaf mold compost. Of course, you can also use them to compost kitchen and garden waste too. Many companies sell wire mesh compost bins, but with a few basic materials you can also make your own.
Begin by gathering your supplies. I’ve used 36-inch and 48-inch tall chicken wire as well as wire fencing to build this type of bin. I do prefer 48-inch tall wire mesh as it holds a larger volume of materials which means it heats up quicker. You will also need a pair of wire cutters to clip the fencing to size and 12-inch zip ties or jute twine to hold the fence together.
There are two main types of wire mesh bins – circular or square.
- Circular wire mesh compost bin – A circular bin is exactly what it sounds like: wire mesh formed into a circle and lashed together. The bin can be sited and immediately filled with composting materials. Cut the wire mesh to size – a thirteen-foot length gives you a bin just over four-feet in diameter. I use gloves when cutting wire as the exposed wire ends tend to be quite sharp. Use zip ties or twine to tie the mesh into a circle.
- Square wire mesh compost bin – A square wire mesh bin uses four wooden stakes to mark each corner with the wire mesh then wrapped around the outside of the stakes. Use zip ties or twine to tie the mesh to each stake. If you want multiple joined bins, these square structures can be sited side by side for a tidy compost area. You can also make wooden framed mesh panels, joining these together to form the bin. This type of mesh bin takes a bit more time to construct but looks more finished if your compost bin is placed where it’s in plain sight.

A trash can compost bin
Got an extra plastic trash can? Use it to create a compact compost bin that can be turned by rolling it on its side, an easy way to advance the composting process. For this type of DIY bin, you’ll need a drill with a half-inch or three-quarter inch drill bit. Drill holes around the outside and bottom of the can, spacing the holes about six to eight-inches apart.
Once the holes have been drilled, place the garbage can on top of bricks to raise it off the ground and boost air flow. This is important if it’s to be placed on a concrete pad, or wooden deck or patio. If you’re going to place the trash can bin on top of soil, you can skip this step as having the holes in direct contact with the soil provides a path for earthworms and other organisms to enter the bin.
Fill the bin and pop the lid back on. Check it every week or two, adding water if it seems dry (composting materials should have the moisture consistency of a damp sponge). To turn the compost, lay the bin on its side (make sure the top is securely attached!) and roll it around a few times.

The best materials to use in a composter
What you put into your DIY compost bin affects the speed of decomposition. Generally, you should aim for a 30:1 ratio of carbon to nitrogen. That means a compost pile needs thirty times more carbon than nitrogen. It helps to store materials until you have enough to fill the bin. Building the layers all at once means the cooking process can get started immediately and results in far less time from start to finish.
Carbon materials:
- Shredded dry leaves
- Straw
- Shredded paper
Nitrogen materials:
- Fruit and vegetable scraps
- Garden debris and trimmings
- Yard waste, weed-free grass clippings
- Coffee grounds or used loose tea

Where to place a composter?
Site your compost bin in a spot that is convenient to access and maintain, offers space for stockpiled materials, and, ideally is in full sun. It can be in a front or backyard. In hot climates, partial shade is best as full sun can dry out the pile. A fully shaded location can cool the bin and slow down the decomposition process. If placing it against a house, shed, garage, or fence, leave some space between the building and bin so air can circulate.
For further reading, we recommend the excellent book The Complete Compost Gardening Guide which is packed with great advice on making compost. We also suggest checking out these posts:
- How to build a worm bin
- Feeding your garden soil: 12 creative ways to use leaves
- Choosing and planting cover crops
Have you ever built a DIY compost bin?

I had a thriving compost bin until ants got in to it. It was infested! How do you get rid of ants without ruining the compost?
Thank you for this information. My biggest issue is where to keep the food scraps I collect over 1-2 months until I have enough (added to the grass clipping I’m saving) to start a new compost pile. I usually place them in airtight buckets, but I wonder whether they should be placed in an open-air bin until ready to use? Can you provide some guidance?
Hi Iris, that is definitely a challenge if you wish to build a compost pile all at once. I tend to collect scraps in a closed bucket (an old ice cream bucket from an ice cream shop) under my sink. I dump it every few days and then cover the materials with a few handfuls of leaves or straw from a bag I keep by my compost bin. You can also place them in an open air bin or barrel until you’re ready to use them, but they will start to break down (unless it’s winter). Or I also know gardeners who freeze scraps (in a deep freezer) until they’re ready to use them. Of course you need a deep freezer with space – not always a convenient solution. Good luck! Niki
Great, thank you!
Thanks for this! I live in Nova Scotia with some pretty cold winters. Do you keep adding kitchen scraps to your compost in winter? So far they’re just freezing. Am I basically just saving my frozen veggie peels to thaw and rot in the spring? Should I pause putting them in the compost over the winter? Thanks!
Hi Sarah, great question! Yes, I would suggest still putting veggie scraps in a compost over winter. They will freeze of course but once the temp heats up they will start to rot and compost down. I usually don’t bother adding straw/leaves in winter but by mid to late March I’ll start to do this again to maintain the C/N radio. My compost bins are in sun and even though it’s often still cold in March/April, the mass of the pile starts to heat up early and those scraps provide nitrogen. Hope this helps! Niki
I really appreciated this article. For some reason it made the most sense to me over all the other compost articles I’ve read.
We produce ALOT of kitchen compost and have always just gone and dumped it outside in our compost area and have watched it sit there and remain kitchen compost. Occasionally, we would add in some stuff. Thanks for putting it in terms a compost challenged person can understand without getting all sciencey 🙂