This post may contain affiliate links. If you make a purchase through links on our site, we may earn a commission.
Worms are decomposers with the ability to turn trash into treasure. Though worms are present in most compost piles, creating a wormbin is an excellent way to use these powerful critters to break down organic wastes and make usable compost fairly quickly. The process is called vermicomposting, and it doesn’t have to be a complicated affair, nor does it have to cost a lot. Whether you use a wormbin or compost pile to recycle kitchen and yard waste, worms can help.
How to build a wormbin:
1. To begin your adventure in vermicomposting, start first with shelter for your worms. If you want practical, easy, and cheap, go with a 10-gallon opaque plastic storage tub with a lid. Use a nail, drill, or chisel to make a few holes around the top of the sides and on the bottom of the bin. The holes on the sides are for air circulation and the ones on the bottom are for drainage, though a properly functioning worm bin will have no excess moisture to drain out. Do not put holes in the lid. They let in too much light and encourage excessive evaporation.
Related post: Helping native bees
2. Once your bin is prepped, get the bedding ready. You can use newspaper (avoid the glossy inserts), office paper, or printer paper. Shred the paper by tearing it into strips or running it through a shredder. This shredded paper makes a great addition to either a wormbin or compost pile. In a compost pile, it serves as a “brown” carbon-rich ingredient. Next, make sure the bedding is moist. Worms breathe by exchanging gasses through their moist skin, so spritz the bedding with a mister full of water. It should be damp but not soaking. Fill your empty bin about 1/3 full with loose bedding.
3. Then, add some food scraps. Vegetable peelings, coffee grounds, fall leaves, and moderate amounts of corrugated cardboard make good worm-composting-scraps. Add a thin layer of these ingredients on top of the bedding material, then add more damp paper bedding and toss in one or two shovels of garden soil for roughage. Top this with another layer of food scraps, and finally, finish with one more layer of bedding. In a wormbin or compost pile, layering multiple ingredients together results in faster decomposition. The bin should be about 3/4 full when you’re done layering. Don’t add meats, oils, or dairy, which can attract flies and maggots. Avoid using too much of any one ingredient to keep your bin well-balanced.
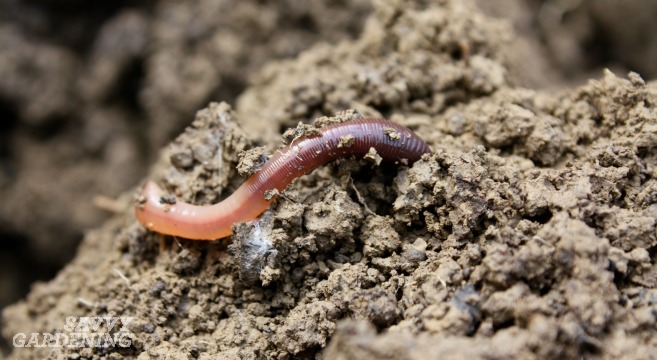
4. Welcome your worms. There are roughly 4,000 different species of earthworms in the world and only six species are known to be suitable for vermicomposting. But one is by far the most popular: the red wriggler (Eisenia fetida). This species can tolerate a wide range of environments, and it eats and reproduces more than most other worms. Purchase a minimum of one pound of worms to start. Buy them from a reputable worm farm and not a bait shop where you can’t be sure you are purchasing the right species. Carefully lift back the top layer of bedding and dump in the worms. Cover them back up with the bedding.
Related post: 12 creative ways to use fall leaves
5. Keep your bin between 59 and 77 degrees F. Red wrigglers will tolerate temperatures outside of that range (up to 95 and down to 32), but they do their best work somewhere in between. Put the bin in a heated garage, the basement, the laundry room, under your kitchen sink, or wherever else you see fit. Do not expose them to below-freezing temperatures.
6. Every few days, feed your worms a cup or two of food scraps by digging a small hole with a hand trowel, tossing the scraps in, and then covering them back up. Put your food scraps in a different spot each time, and don’t overfeed. Add some dry bedding material if the bin gets too soggy or develops an odor, which it should typically not have. Continually adding materials to a wormbin or compost pile is a great way to get rid of kitchen scraps without sending them to the landfill.
7. When it’s ready to harvest, worm compost will be dark, crumbly, and fragrantly earthy. To harvest, pick or sift out as many of the worms as you can and toss them back into the bin, or begin a second bin with them. Use the compost for the flower garden, houseplants, seed starting, container gardens, or in the veggie patch.
Whether they’re in a wormbin or compost pile, worms are excellent garden helpers.
Do you compost with worms? We’d love to hear about your experience in the comment section below.
Pin it! 
I’ve had mine going for years. The only thing I would add is that the bin needs to be opaque, the clear plastic bins won’t work as well – too much light. Oh, and very important is to always cover any food scraps with bedding – that is not an option but necessary if you want to keep various flies and other insects from moving in.
I took a class. Did my bin in a five gallon bin. Fits under the kitchen sink. Still going strong after two years. Strongly recommend this type if bin system for beginners.