This post may contain affiliate links. If you make a purchase through links on our site, we may earn a commission.
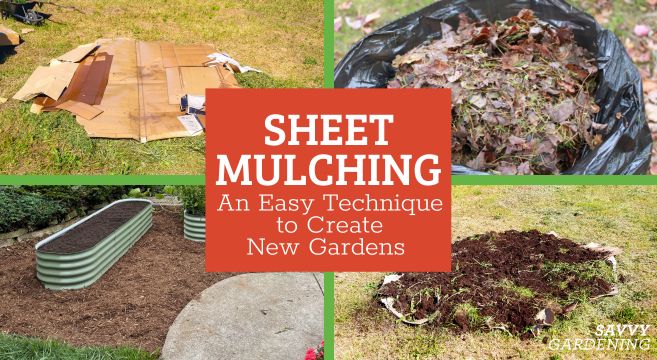
Fall is a great time of year to think ahead to a new plot, and sheet mulching can get you started on that vision. Though it can be done at any time of the year, autumn is ideal because the area will have a chance to break down over the winter. I’ve used this technique to create a garden in my backyard after digging up invasive plants, to establish pathways between raised beds, and to keep weeds out of a new area on my front lawn for galvanized raised beds. The process of sheet mulching enables you to put yard waste, like lawn clippings, fallen leaves, and wood chips, to good use. And by spring, you should have a diggable area, ready for plants.

Let’s say you have several square feet of lawn that you want to turn into a new garden bed. In lieu of removing the sod yourself, or hiring landscapers to do it, sheet mulching will save you time and/or money.
You can think of sheet mulching as a type of composting. But, unlike with a traditional compost pile, once you’ve established your sheet mulch layers, there’s no need to turn anything with a pitchfork. You just let nature do its thing. Over time, the natural decomposition process takes place. What you’re left with is a new garden bed that’s free of weeds and full of beneficial bacteria, fungi, and nutrients.
What is sheet mulching?
Sheet mulching requires very little digging or weeding. Instead, it’s all about systematically layering natural materials, such as fresh grass clippings, pine needles, and fallen leaves, over a base layer of untreated newsprint sections or cardboard. These layers smother any vegetation growing beneath them while gradually decomposing. Although that whole process can take several months, in the end you’ll have a new, weed-free garden bed bursting with richer, healthier soil.
Because of these multiple layers, sheet mulching is sometimes called lasagna gardening. This popular permaculture technique employs an initial weed barrier layer which is then topped with subsequent layers of organic materials.

Typically, the weed barrier itself consists of at least one layer of cardboard or multiple sheets of newsprint. That layer is then topped with organic matter, including some finished compost as well as alternating layers of carbon- and nitrogen-rich materials. Or, if you’re creating a simple pathway where soil composition isn’t as important, that layer may simply be a type of mulch, such as shredded cedar.
The pros and cons of sheet mulch
Successful sheet mulching can greatly improve soil structure and fertility. It just takes a little effort on your part. The incorporation of organic matter attracts earthworms and other beneficial creatures, which, in turn, mix and aerate the soil. Provided you have enough material to put down, you can sheet mulch a fairly large area at one time. (Incidentally, you can even use this technique to establish new garden beds in dead zones like an old gravel driveway.)

As for drawbacks? Once you’ve finished your part of the sheet mulching work, it’s a waiting game. In fact, it can take several months before your new garden bed will be ready for use. Also, depending on the thickness of your base (weed barrier) layer, it initially may shed rainwater and also can impede air flow to the soil below. Still, these effects are temporary, and, once the cardboard has broken down, air and moisture can permeate the garden bed.
The best materials for sheet mulching
Besides untreated cardboard, you’ll need to gather different kinds of organic matter for the remaining sheet mulch layers. Some of this matter will be rich in carbon and some will be rich in nitrogen. Just as it is important to optimize your carbon-to-nitrogen ratio in a traditional compost pile, it helps to have a good mix of carbon and nitrogen for your sheet mulch layers. Alternating carbon-heavy and nitrogen-heavy layers can help to speed their decomposition.

Carbon materials
- Bark mulch/wood chips
- Dried leaves
- Dried, seed-free hay or straw
- Pine needles
- Sawdust
Nitrogen materials
- Fresh grass clippings
- Green leaves
- Manure
- Kitchen scraps
(For details on cardboard, see “The best base layer materials” section.)
How to sheet mulch
- Decide on the size and shape of your new garden bed and gather enough untreated cardboard or newsprint, bark mulch, and nitrogen- and carbon-rich materials to fill it in. (So you don’t end up with too little or too much, remember: one-half of one cubic yard will cover roughly 200 square feet of space at one inch deep.)
- Use a mower or string trimmer to cut down any vegetation inside the new garden space.
- Use an edger to carve around the bed’s exterior, eliminating perimeter weeds and their roots in the process.
- Wet down the area and lay down cardboard or newsprint layers. If you’re concerned about wind, secure this weed barrier layer with a few bricks or landscaping pins. (Just remember where you placed them!)
- Top your weed barrier layer with at least one inch of aged compost.
- Next, alternate some inch-thick nitrogen- and carbon-rich layers.
- Top with at least an inch of bark mulch or wood chips to help weigh down the previous layers. Water well and wait for decomposition to take place.
The best base layer materials
Large, thick pieces of plain cardboard are great for smothering weeds and preventing weed seeds from germinating. Before repurposing cardboard boxes for your base layer, you should first collapse them, removing labels, packing tape, and staples as you go.

Alternatively, you can also use several sheets of newsprint as your base layer. (Just keep in mind that, although most newspapers are printed with plant-based inks, some shiny inserts may contain inks made with potentially harmful heavy metals. To keep these out of the soil, you might want to skip the shiny stuff. The same goes for boxes. Avoid cardboard that looks like it’s been coated or that’s been covered with colorful dyes.)
To kick-start the decomposition process for slightly faster sheet mulching, top your weed barrier layer with at least one inch of aged compost.
How thick should each layer be?
When sheet mulching, individual layers of material should be about an inch thick. But, if you are trying to eliminate really stubborn weeds, you might want to increase the thickness of your compost layers.
You might also need to begin with a slightly thicker cardboard layer. After all, your aim is to eliminate the weeds for good. That means completely smothering their intricate root systems, too.

How soon can you plant after sheet mulching?
How soon you can plant after sheet mulching depends on the kinds of vegetation you originally covered up, how hot your local climate is, and the amount of water the sheet mulched area has received, among other factors. The ratio of carbon to nitrogen contained within and between the various layers also will affect their overall rate of breakdown. As a general rule, the whole process can take about three to six months to complete.

To determine whether or not a sheet mulched bed is ready for planting, you can test dig an area and examine a cross-section of the various layers of compost. If you can still distinguish individual layers and types of organic matter—and especially if the weed barrier layer has yet to break down—then the bed probably needs more time. If, on the other hand, the cardboard or paper layer has mostly disappeared and the other layers have, likewise, been broken down into rich, dark soil, your bed is ready for planting.
More articles about improving your soil
- A how-to guide to composting
- Creative ways to use fall leaves
- The benefits of composting
- Six garden soil amendments
- Why soil pH matters

Leave a Reply