This post may contain affiliate links. If you make a purchase through links on our site, we may earn a commission.
A few years ago, I brought home a gorgeous maroon sedum from a plant sale. I planted it in my front yard garden, only to come out one day and discover the plant gone and a sad-looking, leftover sprig lying abandoned on top of the soil. That was my first effort in figuring out how to propagate sedum—and how easy it is. I have an area in a raised bed that I use as a nurse garden or holding area for plants I don’t know what to do with. So I dug that sad piece of sedum into the soil to see what it would do.
I grow several different varieties of sedum plants in my gardens. I love that the plants are low-maintenance and drought tolerant, and attract pollinators. They’re also hardy and don’t mind being moved around. I’ve found some of my creeping sedums have popped up in unexpected places, like between the cracks of my concrete walkway. I’ll often gently yank them out and simply put them in the garden, covering the roots in soil. When I was planting the sedum mats for the front yard “carpet” that appeared in Gardening Your Front Yard, the odd piece would come loose, roots and all, so it was easy to just plant the sedum somewhere else in the garden.

Learning how to propagate sedum
If you want to create new plants to add to other areas of a garden, I’m going to explain how to propagate sedum a couple of different ways. Sedums are clumping or creeping. I have taller sedums, like ‘Autumn Joy’, which fall into the former category. And I also grow several varieties of groundcover sedums (that are considered creeping), which spread outwards or tumble over rocks out of small crevices. You’ll often find them in rock gardens, in the aforementioned sedum “carpet” placement, and on rooftops. All of these different varieties can easily be propagated to create new plants.

How to make new sedum plants by division
Clumping sedum plants eventually spread outwards. A dead area in the center of the plant is a good indication that the plant is ready to be divided. In the spring, as you start to see growth, gently dig around the whole crown of the plant. Use a soil knife to cut the plant into sections measuring about 12 inches (30 centimetres) in diameter. Replant a piece in its original spot, and dig in the new piece(s) in an area of the garden that has well-draining soil and full to part sun.

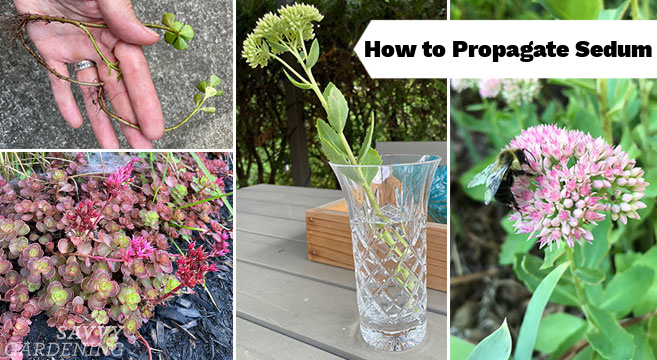
How to propagate sedum from stem cuttings in water
Choose a stem from a healthy sedum plant that’s about six inches (15 cm) long, and make your cut using a clean pair of scissors below a leaf node. Gently remove any other leaves that would be sitting in the water. Place your stem in a jar filled with room temperature water or rainwater, so that it covers the leaf node (but not any leaves). Place your jar in a bright area, like a windowsill or outside on a sheltered patio table. Be sure to change the water every few days to prevent it from going stagnant and your stem from rotting.

Once you see roots starting to form, usually after a few weeks, you can plant your new sedum. Depending on when in the season you’ve taken your cutting (and where you live), you’ll either want to plant the sedum in the garden or plant it in a pot and overwinter it indoors to plant next spring. Propagating sedums earlier in the season means your plant will have time to become established in the garden before the winter.

How to propagate sedum in soil
When I found my sad-looking maroon sprig lying in my front yard garden, I simply planted it in an empty space in one of my raised beds. It rooted, overwintered, and in the spring, I moved my new plant back to the front yard garden where it still grows today.
If you’d like to plant your sedum in a container to display, or until it’s ready for the garden, plant that prepared stem in potting soil containing about 10 percent perlite. (Here are some tips on making your own potting soil.)

How to propagate sedum by layering
If you look closely at creeping sedum plants, you’ll notice that there are often roots already growing along the stem, even if they’re hanging over a rock! What you can do is gently pull out those pieces from the garden.

When you replant the sedum in another area of the garden, be sure to also cover those extra rooted stems with a small amount of soil. This will help you grow a new plant that’s actually still a part of the parent plant. Layering is best done in late spring or early summer

Other plants you can propagate
- Christmas cactus cuttings: When to prune a healthy plant and using the cuttings to make more
- Lemon coral sedum: A grow guide
- Propagating ferns from spores and mother plants
- How to propagate lithops
- Growing basil from cuttings
- How to divide Pilea peperomioides

I have a similar question! I have 3 stems that grew roots…i was feeling to plant them in a little grouping in the same pot – or should it be 1 single stem alone ?
Im zone 6, central NY state. Renting- ill likely just bring them inside!
Can they over winter in a pot if they had to?
Thanks! Great article and pictures.
Hi Lj, I think you can manage putting three to a pot as long as they have some space to grow. You may need to separate later on. Plants usually go dormant in winter, so if you leave them outside, pile put them in a protected spot with lots of leaf mulch to protect them from the cold.
Once the cuttings have rooted, how far apart should I plant each cutting? I have cuttings of Sedum Autumn Joy that are ready. I have three small containers that each have four cuttings. Some already have tiny blooms. Thanks.
I would space them out in the garden with their eventual full size in mind. Even though it looks a little empty now, they’ll eventually fill in for you.
Thank you for sharing this information. It’s simple and succinct for me as a newbie propagator. Just completed my first trial on my Autumn joy sedum (a little late ai know). The first one I bought last year was beautiful but died off in a freeze (Alabama mind you). Instead of buying a new one I thought I’d try saving money and growing my own.
Hi Stacey, I’m so glad this was helpful! It’s pretty fun to create new plants from something you already have. Best of luck with your propagating!
Very interesting and educational. Thank you