This post may contain affiliate links. If you make a purchase through links on our site, we may earn a commission.
Whether you like to use your homegrown green beans in a good old-fashioned green bean casserole or in modern stir-fries, learning how to freeze green beans for later use is important, especially when the garden is producing them like crazy. Thankfully, freezing green beans from the garden is an easy process, but there are some essential steps to follow for success. In this article, I offer simple step-by-step instructions so you can enjoy the fruits of your garden for many months to come.

Why freeze green beans
There are several reasons why freezing green beans (also known as snap beans) makes good sense. First, it’s much easier than canning. You don’t need any special equipment, and it only takes a few moments to do. Plus, when they’re prepared correctly, freezing maintains the flavor, crisp texture, and nutrient content of green beans. Prep time is only 5 or 10 minutes, and the total time required from start to finish is less than 30 minutes.
And, of course, you can freeze raw green beans from the farmer’s market or grocery store, too. They don’t have to come from your garden.
What types of green beans can you freeze?
When it comes to learning how to freeze green beans, the first step is to know which types of fresh green beans are good for freezing. The answer here is simple: All of them! Whether you grow ‘Provider’ snap beans, ‘Kentucky Wonder’ pole beans, yellow varieties like ‘Yellow Wax’ or ‘Gold Rush’, purple-podded types like ‘Royal Burgundy’, or flat-podded Romano beans, they’re all perfect for freezing – and they all pack a powerful nutrition punch, including protein, potassium, and calcium.
Preparing green beans for freezing
Begin by preparing the beans. Snap off the ends to remove the stem and the blossom end. Green beans can be frozen whole, or you can snap them into small sections or use a sharp knife to cut them into smaller pieces.
After trimming and cutting the beans, wash them under cold running water to remove any dirt or debris.

Do you need to blanch green beans before freezing them?
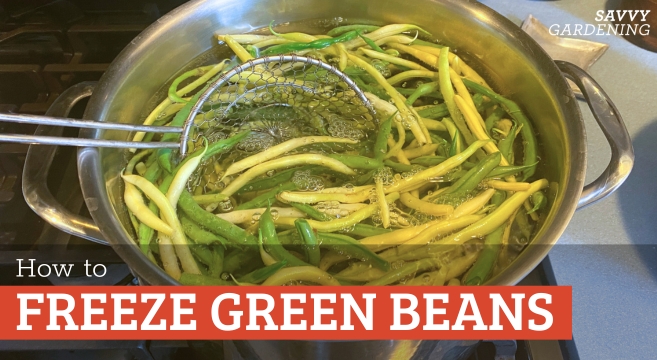
Blanching is an essential step in learning how to freeze green beans. Blanching locks in the flavor, acts to preserve the bright green color, and keeps the texture from turning mushy. The trick is to dunk the beans in a pot of water at a full boil for just the right amount of time. Too long and the beans lose their “snap” and fresh taste. Too short and the texture is too soft once the beans are prepared for eating.
Watch me blanch and freeze my homegrown green beans in this short video:
How to blanch
To blanch green beans, you’ll need a large pot of water at a boil, a slotted spoon or a ladle strainer (my favorite) to lift the beans from the water if you’re blanching multiple batches, or a colander for draining the water if you only have one batch to blanch.
You’ll also need some tea towels and zipper-top plastic bags or reusable freezer bags, such as these silicon bags which I love.

How long to blanch green beans for
Once your beans are prepped and your water is at a full boil, drop the beans in and set your kitchen timer for exactly two minutes. This is a standard blanching time for almost all vegetables you plan to freeze, including kale (learn how to freeze kale here), broccoli, cauliflower, carrot rounds, and more.
After the two minutes have passed, immediately remove the green beans from the water using the slotted spoon or ladle strainer. If you don’t have any more green beans to freeze, you can drain off all the water using a colander. Move fast for this step, because it’s very important that the beans go immediately into an ice water bath to quickly stop them from cooking.

Setting up an ice water bath
While your green beans are blanching in the boiling water, prepare a large bowl of ice water as your ice bath by mixing cold water with ice. I like to use a large bowl that’s metal, but glass or plastic would do, too. The ice water should be as cold as possible to stop the cooking immediately.
If you don’t have an ice maker, I like to make ice in this stackable set of ice cube trays that doesn’t take up a lot of room in the freezer but makes a lot of ice.

Drain and dry the green beans
It only takes a minute or two for the green beans to cool once they’ve been removed from the blanching water and dunked in the ice water bath. After they’re fully cooled, either drain off the ice water or, if you have another batch of green beans waiting to be blanched, use your hands to remove them from the bowl, saving the ice water for the second batch of beans.
Spread the green beans out in a single layer on a tea towel (or tea towels, depending on how many you have). Take a second towel and pat off the green beans, removing as much water as possible.
From here, you have two options on how to freeze green beans.

Option 1: Freeze green beans on sheet pans
The first method is perfect if you like to freeze green beans in a larger reusable freezer bag and then just grab a handful or two of frozen beans at a time. For this, place the blanched, cooled, and patted-dry green beans on a baking sheet in a single layer. Put the sheet in the freezer overnight. The beans will freeze solid but they’ll stay separate. Dump them into a bag and put it immediately back into the freezer. Each bean is frozen individually so it’s easy to remove only as many as you need for the instructions of a recipe.

Option 2: Freeze green beans in freezer bags
If you prefer to freeze green beans in whole servings (or a group of servings), you can skip the pre-freeze on the baking sheet. Simply pack the desired number of servings into a freezer bag, squeeze out as much air as possible, and label the bag with a Sharpie.
Since there are three of us in my house, I freeze my green beans in three-serving bags and stack the bags in the basement freezer. Then, when we want green beans for a side dish, I just pull out a bag and steam them until they’re ready to eat.

Freezing prepared green beans already in recipes
Another way you can freeze green beans is to pre-make casseroles, soups, stews, pot pies, and other recipes that contain green beans and freeze the whole finished recipe. For casseroles, I like to freeze them in Pyrex glass casserole dishes with silicone lids and just stack them in the freezer. Simply heat in the oven or microwave when you’re ready to eat. For soups and stews, I like to freeze them in these large silicone freezer containers that are stackable.
When freezing premade dishes, there’s no need to blanch the green beans before freezing because the cooking process used in preparing the recipe acts much like the blanching process.

How long do they last?
If consistently kept below freezing, properly prepared, blanched, and frozen green beans will last up to a year in the freezer. If you don’t dry off the excess water, ice crystals may form on the beans that could cause freezer burn. Remember to try to squeeze out as much air before sealing the bag, too.
For advice on growing more beans and maintaining healthier, more productive plants, please visit the following articles:
- Growing green beans – step by step
- What to do when green bean leaves turn yellow
- How to grow black beans
- Best supports for pole beans
- Lima beans
Pin this article to your Harvesting or Food Preservation board. 
Leave a Reply