This post may contain affiliate links. If you make a purchase through links on our site, we may earn a commission.
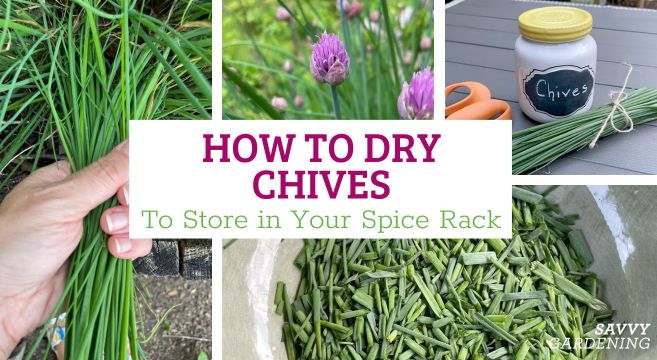
Chives are one of those perennials herbs that you can enjoy in several ways—you can infuse the blossoms in spring to make chive blossom vinegar, chop the tender stalks to use fresh in salads or as garnishes in place of green onions, and dry the leaves to grab from the spice rack and enjoy later. In this article, I’m going to focus on how to dry chives.
Drying chives removes the water content, allowing them to keep for much longer without worrying about them rotting, or developing mold or bacteria. It also ensures you can enjoy the onion-y flavor throughout the winter months in various dishes when the plants are not available, though it’s worth noting the flavor and aroma is weaker than fresh. Sprinkle them on top of a baked potato, whip them into eggs, stir them into a dip for potato chips, rehydrate them in hearty soups and stews, or infuse them to make a savory chive butter. There are so many recipe options.

Harvesting chives for drying
If you live in an area that doesn’t get a killing frost, you can harvest your chives throughout the whole year. Those of us who live in cold climates can enjoy fresh chives straight out of the herb garden throughout the growing season. However drying them puts them at our fingertips to use anytime throughout the year. Jessica has written a very thorough article about when and how often you can harvest chives.
You can use regular kitchen scissors or herb scissors to trim a handful of chives for drying. Check for and remove any dried out or yellowing leaves. You also may want to check for and fish out the stems from the chive blossoms (if you didn’t cut them back in spring), which will be tougher than the soft chives.
Once they’re in the kitchen, give your chives a thorough rinse to remove any bugs or debris. A salad spinner will help get rid of excess water. Lay them out on a tea towel to dry completely. Pat them dry to ensure there is no water left behind.
Use your scissors to cut the chive leaves or pull out a cutting board and kitchen knife to finely chop them into small pieces.

Storing dried chives
Whichever of the following methods you use to dry your chive harvest, be sure to store your dried herbs in an airtight container in a cool dry place. Moisture will ruin your efforts. I use glass preserve jars my dried herb storage.

Be sure to write the date you started storing your dried chives. The flavor will start to wane over time—they last about two to three years. Since chive plants come back each spring, it’s easy to restock your spice rack supply at least once a year.
How to dry chives in a bowl
One of the easiest ways to dry chives is to simply harvest a handful and snip them into pieces in a bowl. Give them a little stir with your hands or a spoon every day or so. Once they’re completely dried out (usually just a few days, depending on the humidity in your home), you can store them away. I will say if they’ve been out too long they get a bit woody and lose their flavor completely. If they start to crumble slightly, they’re ready.

Hanging chives to dry
Air-drying chives upside-down is another way to preserve them for later use. Using the tips above, grab a handful of chives and tie a piece of twine or string around them to hang in a dry place. Too much humidity and your herbs will rot. Some gardeners recommend hanging your chive bunch in a ventilated paper bag to keep the sun and dust off your herbs. But I like to go for the 18th century apothecary vibe—dust, direct sunlight, and all, so my herbs hang off a curtain rod in the dining room window until they’re ready to be put into jars. Chives don’t take long to dry out completely—usually just a few days. You’ll know they’re ready when a piece can be snapped off.
How to dry chives in the oven
If you don’t have a food dehydrator, consider drying chives in the oven. I feel like this method helps preserve a bit more flavor. Preheat the oven to the lowest temperature setting. (For my oven, it’s 170°F). Cover a baking sheet with a layer of parchment paper. Arrange a single layer of chopped chives on the parchment. When the oven has warmed up, place them on the middle rack and set a timer to check on them every 10 minutes or so.

If you have an electric oven, use something to keep the door ajar for air circulation. (If you have a gas oven, don’t leave it open, but open the door more frequently). Bake until chives are crispy and dried out. This will depend on your oven and the moisture content of the chives. It can take anywhere from 30 minutes to about an hour for chives to dry out in the oven. Be sure to check on them frequently. Allow your chives to cool completely before storing them away.
Drying chives in a dehydrator
If you have a dehydrator, you can use it to dry any of the herbs from your garden. Read the directions for your model carefully. Prepare your chives by cutting them into strips and placing them on the dehydrator tray. Use the setting that’s meant for herbs and dry accordingly.
Freezing chives
I find that freezing chives helps to preserve the flavor a bit more than drying. I’ll chop up the chives, throw them in a freezer bag, make sure all the air is let out, and toss them in the freezer.

More tips to preserve your harvest
- Freeze an overabundance of kale
- Tips for freezing berries
- Make salsa verde with tomatillos
- Turn garlic scapes into pesto
- Drying oregano
- Harvesting and drying thyme

Leave a Reply